起因:因为自己在做的后端项目中没有swagger接口文档,所以想集成一下,后面可能会用到,当我根据集成操作指南进行集成时发现在启动项目时会报错,报错信息如下
Failed to start bean ‘documentationPluginsBootstrapper’; nested exception is java.lang.NullPointerException意思是说在springboot启动时在容器中没有加载到这个bean导致npe
在网上查了一下说是springboot版本问题,由于springboot版本过高导致与swagger不兼容,于是就改了一下springboot的版本,从目前使用的2.6.13改成了2.3.0,结果发现mysql启动器就跟着报错了,当改成合适的mysql版本后发现连接池报错,这个方法就放弃了,如果直接修改springboot版本会导致一连串的问题。
<spring-boot.version>2.6.13</spring-boot.version>于是就改了swagger的版本,从原来的2.9.2改成了3.0.0,然后重启项目,发现依旧报相同的错误
<dependency>
    <groupId>io.springfox</groupId>
    <artifactId>springfox-swagger2</artifactId>
    <version>2.9.2</version>
</dependency>
<dependency>
    <groupId>io.springfox</groupId>
    <artifactId>springfox-swagger-ui</artifactId>
    <version>2.9.2</version>
</dependency>于是又搜索了一下,在一个博主的文章中提到springboot2.6的版本问题,源git地址:【Spring 5.3/Spring Boot 2.4 支持 ·问题 #3462 ·springfox/springfox ·GitHub的】
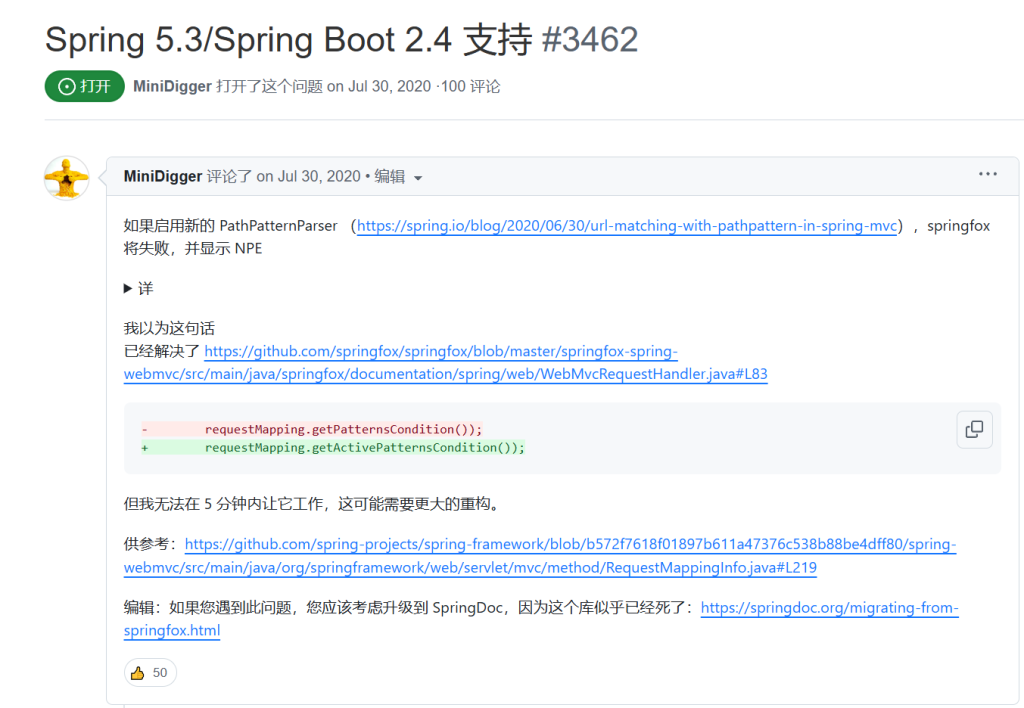

所以具体原因应该是因为springboot版本原因导致的,因为Springfox使用的路径匹配是基于AntPathMatcher的,而Spring Boot 2.6.X使用的是PathPatternMatcher,所以我在yml中调整了matching-strategy,改为了ANT_PATH_MATCHER
  # 在与swagger集成时由于springboot版本原因导致无法加载bean
  # Springfox使用的路径匹配是基于AntPathMatcher的,而Spring Boot 2.6.X使用的是PathPatternMatcher
  mvc:
    pathmatch:
      matching-strategy: ANT_PATH_MATCHER
改完后重启项目,发现我的项目还是存在相同的问题,后来就没在使用swagger2进行集成,改用了Knife4j,集成过程很顺利,与swagger2一样简单(本来就是对swagger的增强),集成后重启没有报错。下面是整理集成过程:
注:由于我的项目是使用的springboot2.6.3的版本存在版本问题,如果在2.6.x之前的版本,可能不会用类似的问题
我这里使用的是旧版本的(2.0.9)knife4j,官方文档地址:【knife4j (xiaominfo.com)】
首先引入依赖:
<dependency>
    <groupId>com.github.xiaoymin</groupId>
    <artifactId>knife4j-spring-boot-starter</artifactId>
    <!--在引用时请在maven中央仓库搜索2.X最新版本号-->
    <version>2.0.9</version>
</dependency>
将matching-strategy配置为ANT_PATH_MATCHER
  # 在与swagger集成时由于springboot版本原因导致无法加载bean
  # Springfox使用的路径匹配是基于AntPathMatcher的,而Spring Boot 2.6.X使用的是PathPatternMatcher
  mvc:
    pathmatch:
      matching-strategy: ANT_PATH_MATCHER
创建Swagger配置依赖,这里是官网版本,也可以将apiInfo单独写一个方法,这里使用的注解就不再是@EnableSwagger2了而改为了@EnableSwagger2WebMvc
@Configuration
@EnableSwagger2WebMvc
public class Knife4jConfiguration {
@Bean(value = "defaultApi2")
public Docket defaultApi2() {
Docket docket=new Docket(DocumentationType.SWAGGER_2)
.apiInfo(new ApiInfoBuilder()
//.title("swagger-bootstrap-ui-demo RESTful APIs")
.description("# swagger-bootstrap-ui-demo RESTful APIs")
.termsOfServiceUrl("http://www.xx.com/")
.contact("xx@qq.com")
.version("1.0")
.build())
//分组名称
.groupName("2.X版本")
.select()
//这里指定Controller扫描包路径
.apis(RequestHandlerSelectors.basePackage("com.github.xiaoymin.knife4j.controller"))
.paths(PathSelectors.any())
.build();
return docket;
}
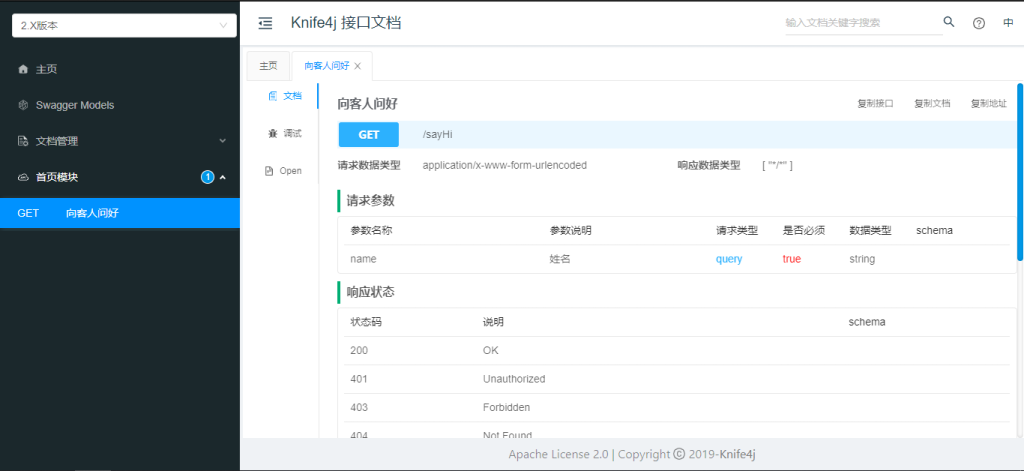
}之后就是正常编写接口,在接口方法上添加@Api注解与@ApiOperation注解,在注解中配置接口的描述等信息(官网示例)
@Api(tags = "首页模块")
@RestController
public class IndexController {

    @ApiImplicitParam(name = "name",value = "姓名",required = true)
    @ApiOperation(value = "向客人问好")
    @GetMapping("/sayHi")
    public ResponseEntity<String> sayHi(@RequestParam(value = "name")String name){
        return ResponseEntity.ok("Hi:"+name);
    }
}
重启项目,访问:http://localhost(ip):xxx(port)/doc.html